
The Conversation Quilt (with tutorial!)
I've got two quilts in the show at Quilt Con this week--Fulls Stops and The Conversation Quilt!
 I blogged about Full Stops fairly recently (you can read about it here and here), but the one on the right has only made one brief appearances when it was in progress.
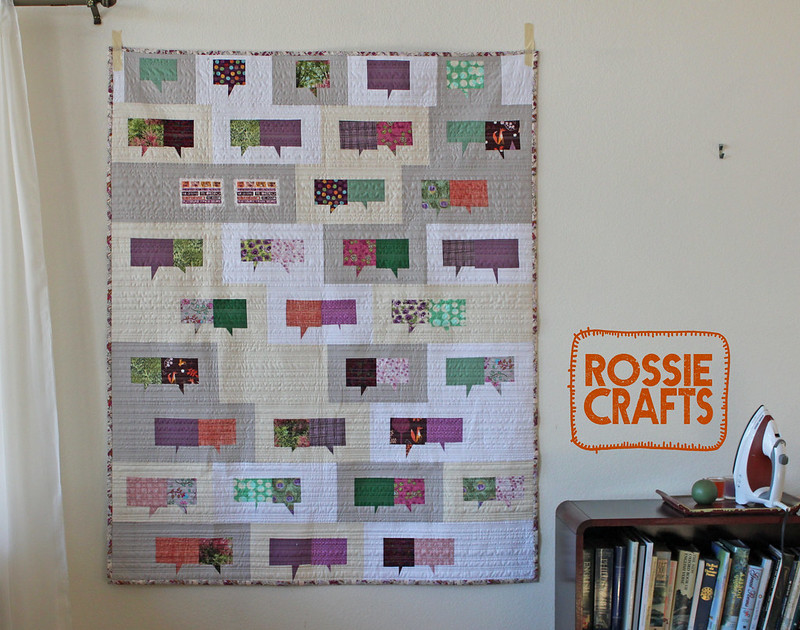 It's "The Conversation Quilt" and I love the way it turned out! I had it quilted for me by the lovely Bernie. You can go back and read the earlier post about this quilt if you want to hear about its inspiration, but basically, it is a quilt for one of my dearest friends on the occasion of his wedding. He never stops talking, so the conversation bubbles are partly a joke on him about his non-stop chatter, but also meant to symbolize a relationship as a "long conversation." The fabrics used inside the bubbles are (mostly) re-used pieces from an enormously long bunting they had in their wedding tent.
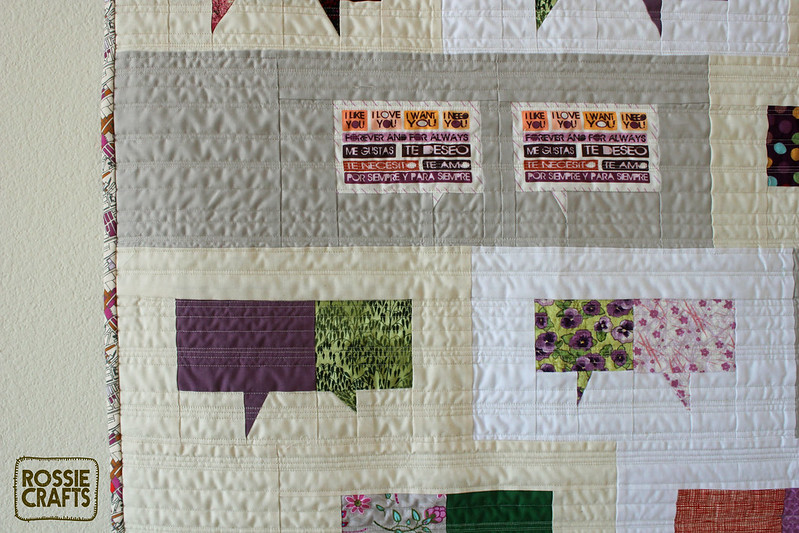 The top row is single bubbles (their time before they met), in the second row they meet and begin talking to each other, the third row begins with their wedding vows, and the rest is them in conversation with each other. That blank spot represents those inevitable pauses and disconnects in relationships...they are normal, so I wanted to depict them in some way.
Anyway, I think this block is tremendously fun and has a lot of potential so, I am posting a tutorial for you!
The top row is single bubbles (their time before they met), in the second row they meet and begin talking to each other, the third row begins with their wedding vows, and the rest is them in conversation with each other. That blank spot represents those inevitable pauses and disconnects in relationships...they are normal, so I wanted to depict them in some way.
Anyway, I think this block is tremendously fun and has a lot of potential so, I am posting a tutorial for you!
 The conversation bubble unit is pieced improvisationally from two or more
fabrics. Since it is pieced improvisationally, there is no exact yardage for me to tell you to purchase. In the quilt above, which is about 36x45" I used less than a yard each of the white, gray, and tan fabrics. You could, of course, use a single fabric for the background or mix it up even more than I have.
You can use one, several, or many fabrics for the contents of the conversation bubbles. I have about 20 fabrics in the bubbles, which made it fairly easy to keep the spread them around the quilt (not next to the same fabric in any direction.)
The core unit of the block has three sub-units, labelled in the picture below. Keep these numbers in mind as I refer to them throughout the tutorial.
The conversation bubble unit is pieced improvisationally from two or more
fabrics. Since it is pieced improvisationally, there is no exact yardage for me to tell you to purchase. In the quilt above, which is about 36x45" I used less than a yard each of the white, gray, and tan fabrics. You could, of course, use a single fabric for the background or mix it up even more than I have.
You can use one, several, or many fabrics for the contents of the conversation bubbles. I have about 20 fabrics in the bubbles, which made it fairly easy to keep the spread them around the quilt (not next to the same fabric in any direction.)
The core unit of the block has three sub-units, labelled in the picture below. Keep these numbers in mind as I refer to them throughout the tutorial.
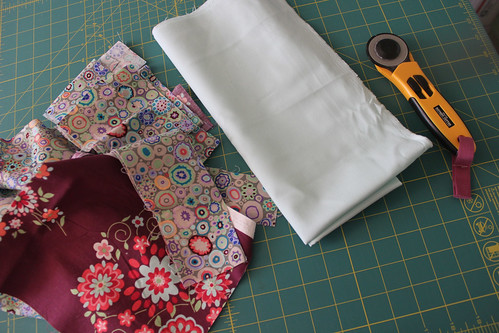
 To make a few blocks today, I pulled out some pale teal fabric and some scraps.
 This block lends itself well to using scraps for the bubbles as you only need a little bit of each print.
The first thing to do is cut a rectangle (sub-unit 3) from each of your bubble fabrics.
This block lends itself well to using scraps for the bubbles as you only need a little bit of each print.
The first thing to do is cut a rectangle (sub-unit 3) from each of your bubble fabrics.
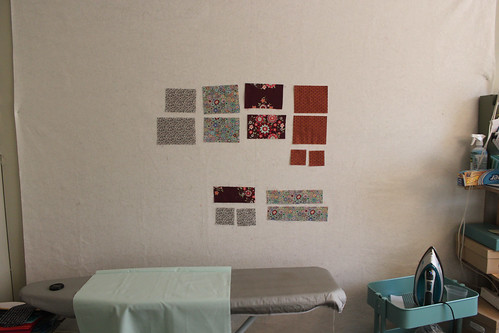 My rectangles vary from 4.5"x7" to 3"x6" I think the variation brings life to the pattern. You could, of course, cut them all identically if that's more your style. Leave some of each fabric for the triangle part of each bubble; these can be quite small, but a half-square triangle from a 3" square is a good starting place.
Sub-units 1 and 2 use solids as the base. For these pieces, I cut 3.5" strips of my solid fabric. I then cut those strips into rectangles of varying lengths, 3.5" to 4" You need two of these rectangles for every conversation bubble you'll be making.
To make the sub-unit marked "1" above, simply take one of the solid rectangles and attach a triangular scrap to the corner.
My rectangles vary from 4.5"x7" to 3"x6" I think the variation brings life to the pattern. You could, of course, cut them all identically if that's more your style. Leave some of each fabric for the triangle part of each bubble; these can be quite small, but a half-square triangle from a 3" square is a good starting place.
Sub-units 1 and 2 use solids as the base. For these pieces, I cut 3.5" strips of my solid fabric. I then cut those strips into rectangles of varying lengths, 3.5" to 4" You need two of these rectangles for every conversation bubble you'll be making.
To make the sub-unit marked "1" above, simply take one of the solid rectangles and attach a triangular scrap to the corner.
 The process is the same as what is described as "the exquisite" from Liberated Quiltmaking or "stitch and flip triangles" from Quilting Modern. Simple take your scrappy triangle and position it right-sides together over your base fabric (see the diagram above). You'll be stitching along the line marked in yellow, you can quickly check that you've positioned the fabric correctly by gently folding a 1/4-inch seam in the fabric, and seeing if the background fabric is covered (as in the photograph below).
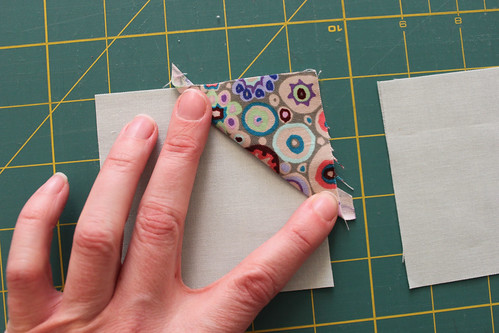 You can do all of these in one go, but keep in mind that if you want to have the conversation bubbles talk to each other like this:
 You need to mix up the location of that triangle you're stitching!
 Once you've sewn those seams, trim away the excess from the background.
 And then press the triangle.
 You may need to square up the sides marked with arrows in the following pictures.
 Once that is done, take each sub-unit 1 and join it with a sub-unit 2. If it's for a bigger bubble, grab a bigger rectangle.
 Finally, attach the bubble (sub-unit 3) along the top.

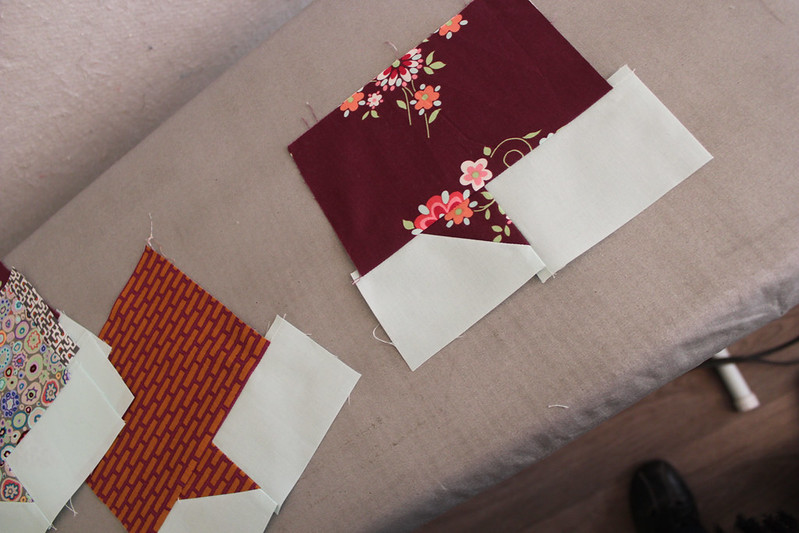 Square up these units. I recommend using the seam that attaches the bubble to the rest of the block as the guide for squaring up.
Where you go from here is up to you! In my new version of this quilt, I'm planning on floating the conversation bubbles in negative space:
Square up these units. I recommend using the seam that attaches the bubble to the rest of the block as the guide for squaring up.
Where you go from here is up to you! In my new version of this quilt, I'm planning on floating the conversation bubbles in negative space:
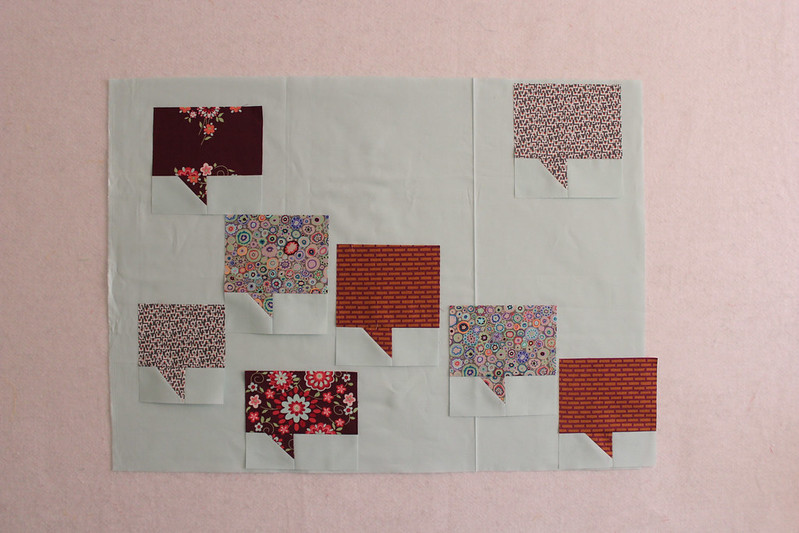 In the version of the quilt on display in Austin this week, most of the bubbles were paired with another, then had more background fabric added to each side and the top.

 CREDIT REQUIRED: Anyone is free to use this tutorial to construct a quilt; However, if this is where you got your design idea or where you learned this method, you should credit me, Rossie, with inspiration and please link back to this blog post (The Conversation Quilt with Tutorial).


I also think it could be fun to have tiny bubbles floating around a big bubble OR patchwork inside the bubbles AND this could be a really fun way to use novelty fabrics. Basically, the options are unlimited!
If you're lucky enough to go to Quilt Con this week, please stop and say hello to my quilts! Also, if you see me, holla!
If you use this tutorial, remember to credit me!
CREDIT REQUIRED: Anyone is free to use this tutorial to construct a quilt; However, if this is where you got your design idea or where you learned this method, you should credit me, Rossie, with inspiration and please link back to this blog post (The Conversation Quilt with Tutorial).
WANT MORE? I have a Patreon where members get a new tutorial every month for less than the price of a latte! Support I receive through my Patreon gives me the time and materials to make more quilts and more tutorials.
Originally posted in 2013 // most recently edited in 2021 (fixing links and formatting)