
DIY Soccer Jersey
It's crazy how fulfilling I find it to be able to make certain things for myself.
This weekend, I needed to go to the thrift store for a light blue shirt. I need it for a soccer team I'm subbing on next month. I was whinging to myself a bit about this trip; I was going to have to walk to the store, which I wasn't in the mood for. And then I was going to have to dig through their shirts for one that was 100% cotton and big enough and the right color and didn't say anything too obnoxious on it. There are days where that sounds like fun; this was not one of those days.
Then I remembered that I had white t-shirts and blue dye. Ten minutes later, a white t-shirt was submerged in a dye bath.
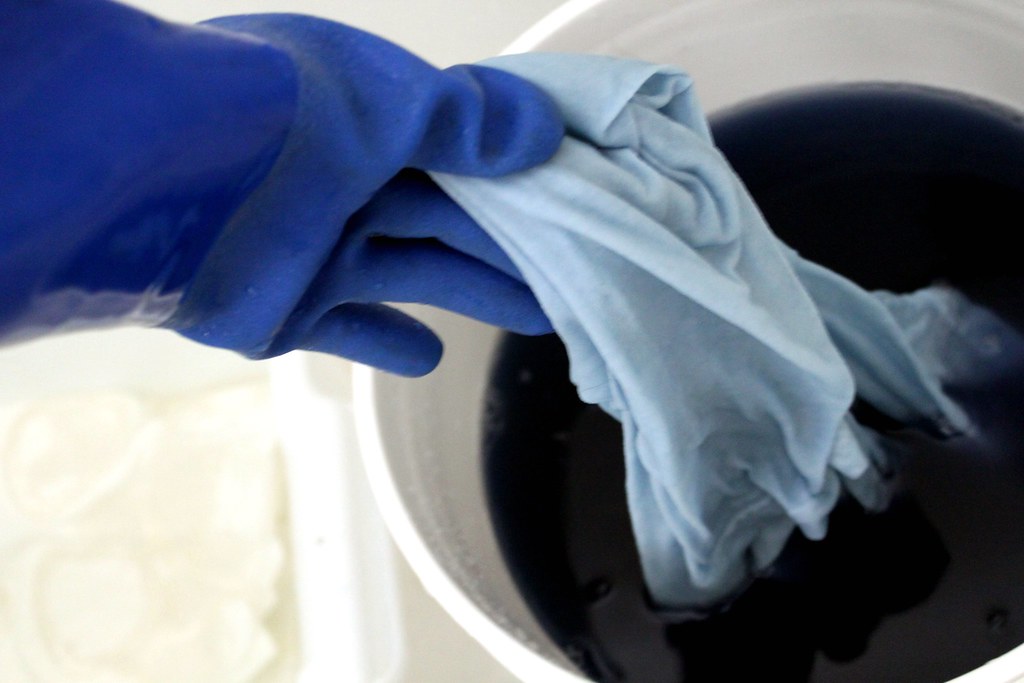 I used most of the same steps you'll find in my Immersion Dyeing Tutorial, except that I didn't paste the dye up in a dish, but added it to a squeeze bottle with some salty water, shaking it to mix. I used a squeeze bottle because I figured I'd start the dye bath with a very small amount of dye in it and then slowly add more if the shirt was too light; the squeeze bottle makes that easy and safe.
The trick to getting pastel colors is to have only a small amount of dye in the bath...it's not like paints where you stir in white to get pastels.
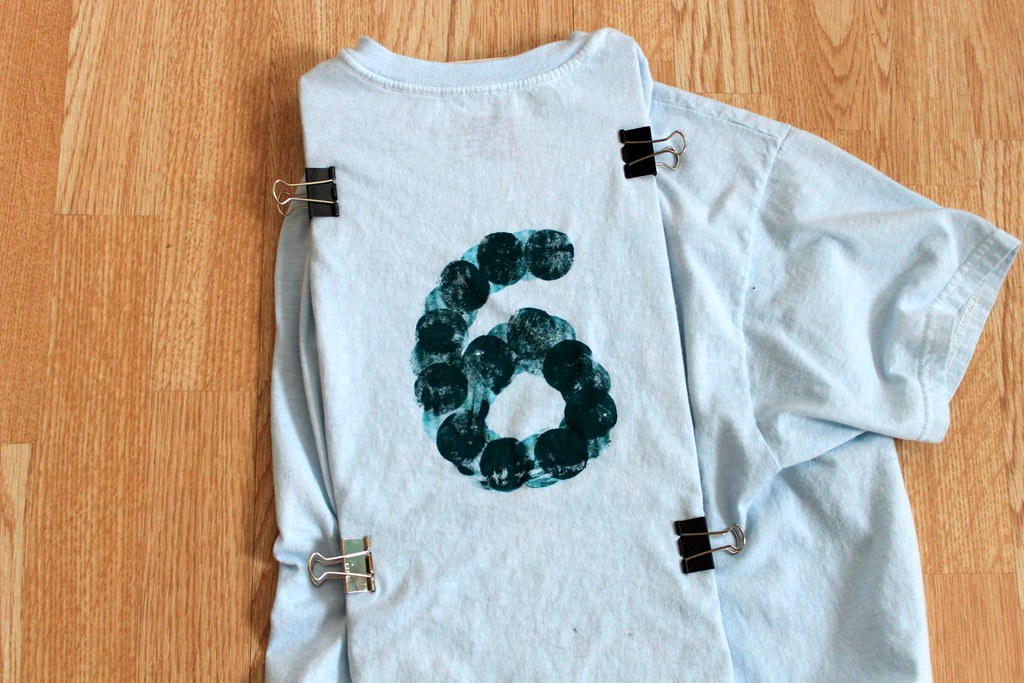
After the dye bath and washing the shirt, I printed my jersey number on the back. I contemplated getting a more polished look by using paint and a freezer paper stencil or maybe whipping out the fabric markers, but I decided I wanted a sort-of handmade dot-matix look, so I used a radish to stamp paint on the shirt.
 I like the result and am ready to play!
This weekend, I needed to go to the thrift store for a light blue shirt. I need it for a soccer team I'm subbing on next month. I was whinging to myself a bit about this trip; I was going to have to walk to the store, which I wasn't in the mood for. And then I was going to have to dig through their shirts for one that was 100% cotton and big enough and the right color and didn't say anything too obnoxious on it. There are days where that sounds like fun; this was not one of those days.
Then I remembered that I had white t-shirts and blue dye. Ten minutes later, a white t-shirt was submerged in a dye bath.

The trick to getting pastel colors is to have only a small amount of dye in the bath...it's not like paints where you stir in white to get pastels.
After the dye bath and washing the shirt, I printed my jersey number on the back. I contemplated getting a more polished look by using paint and a freezer paper stencil or maybe whipping out the fabric markers, but I decided I wanted a sort-of handmade dot-matix look, so I used a radish to stamp paint on the shirt.
